Jukebox miter gear system
Personal Build · 2026 · Mechatronics

Self-made
Jukebox

A robotic arm that autonomously picks vinyl records and places them on the turntable. Designed, 3D-printed, wired, and coded entirely from scratch.

Build time1 week
Printed parts15 PLA
Motors4 (2× servo 10Nm, 1× stepper, 1× mini servo)
MicrocontrollerArduino Uno R3
SoftwareFusion 360 · C++ (Arduino)
01 — Overview

What it does

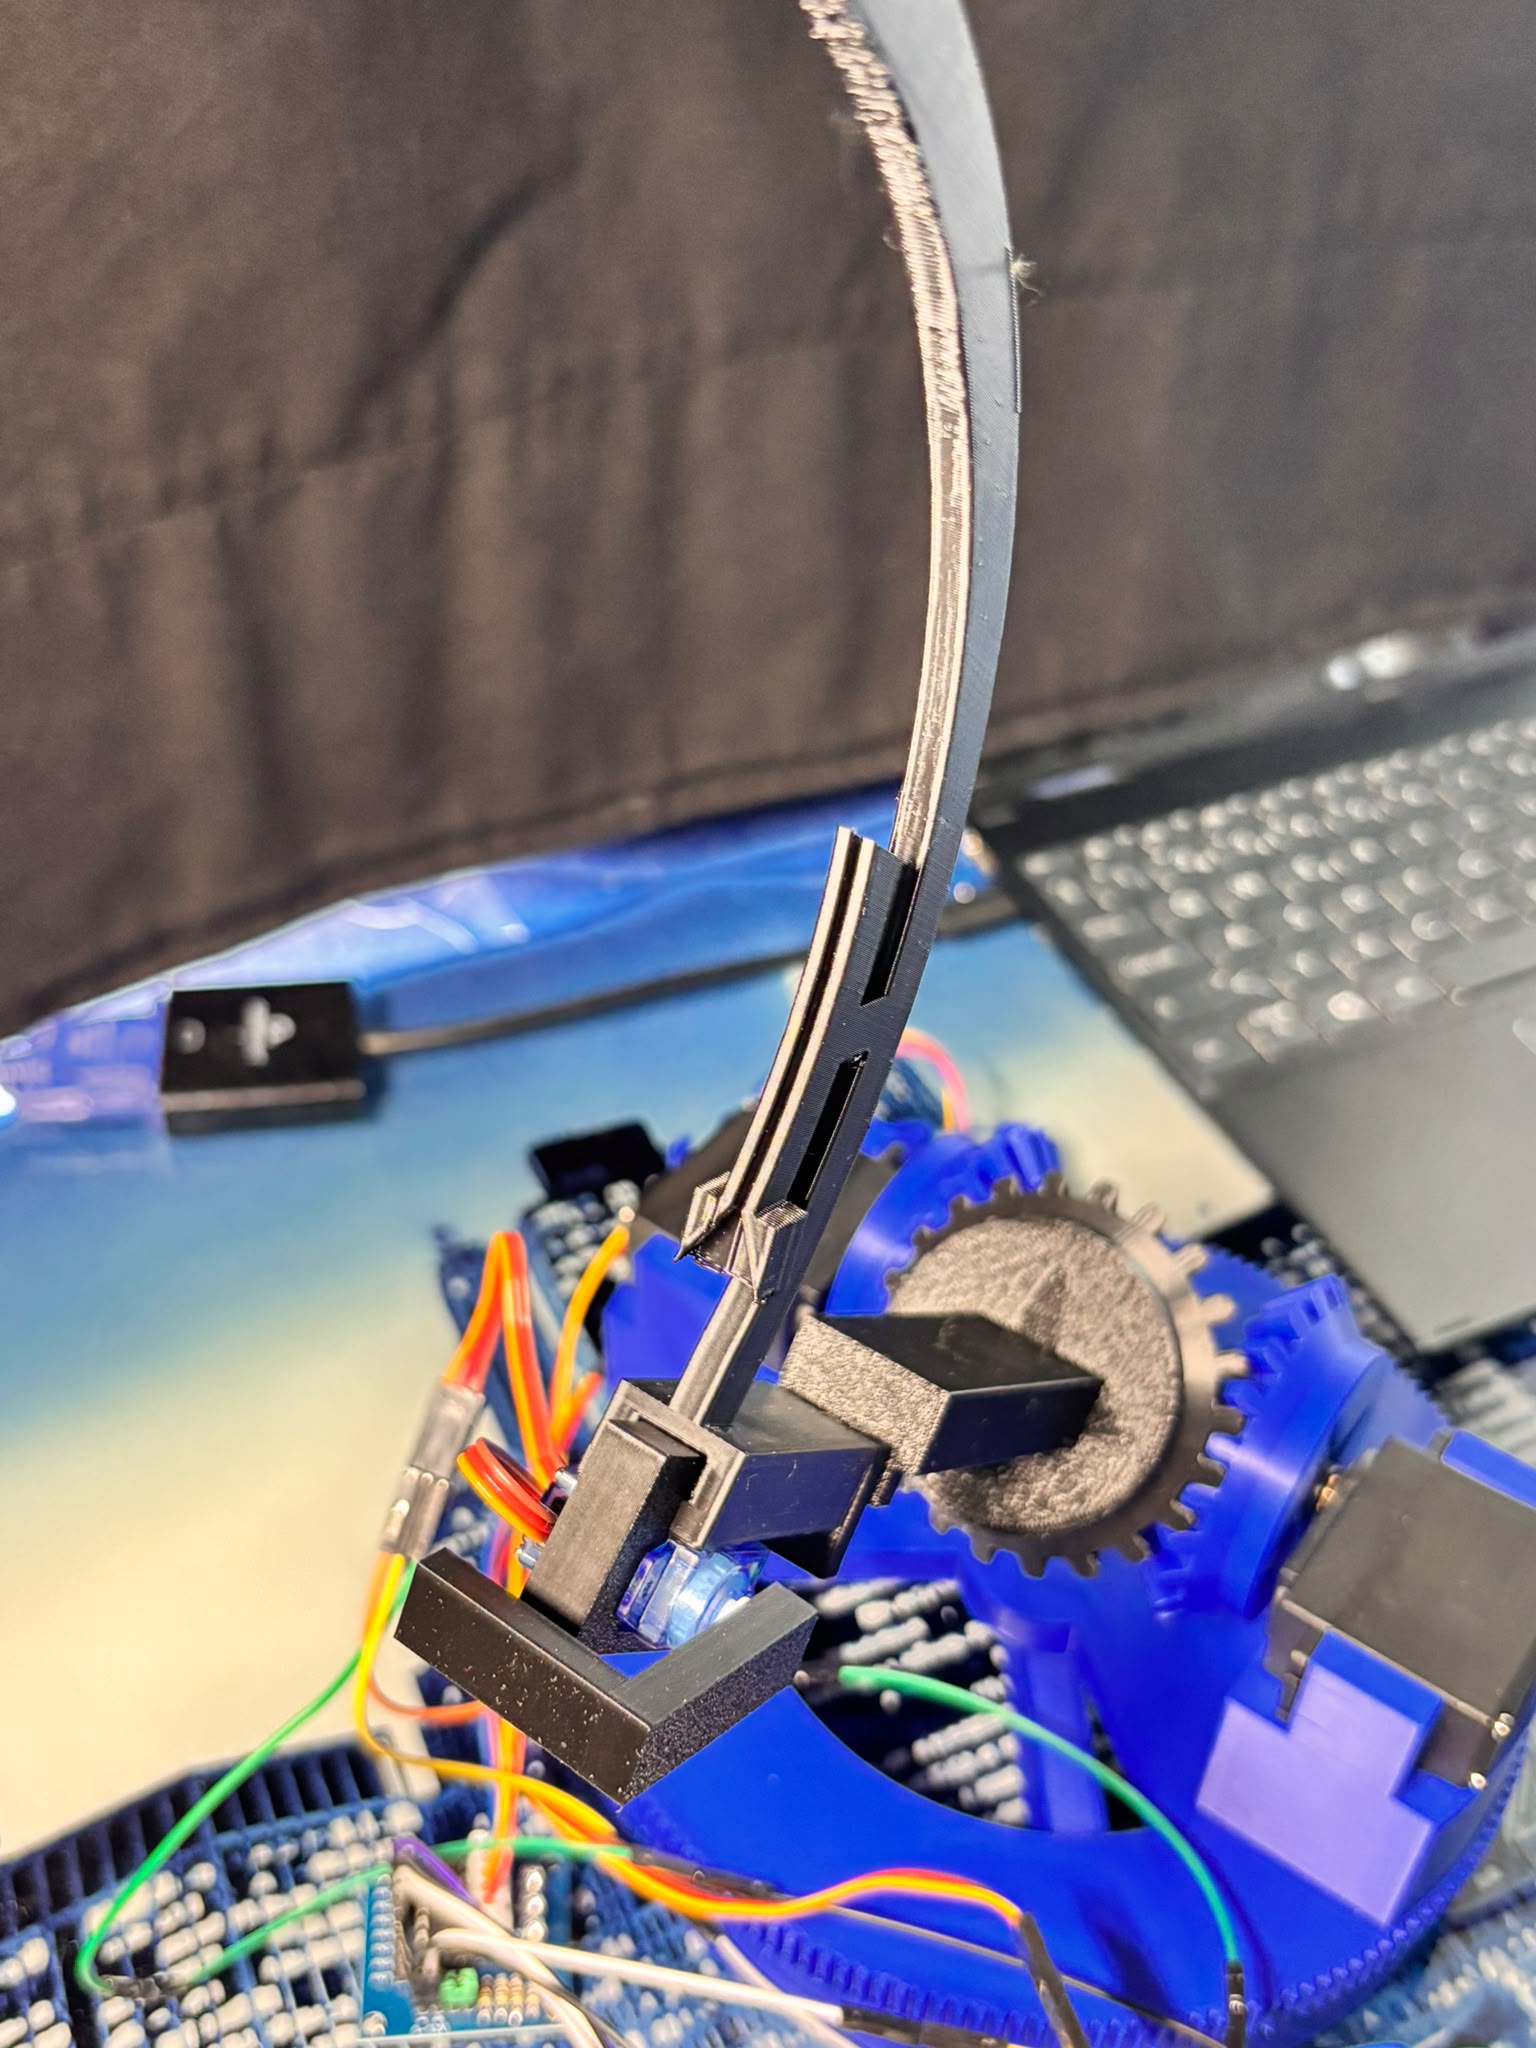
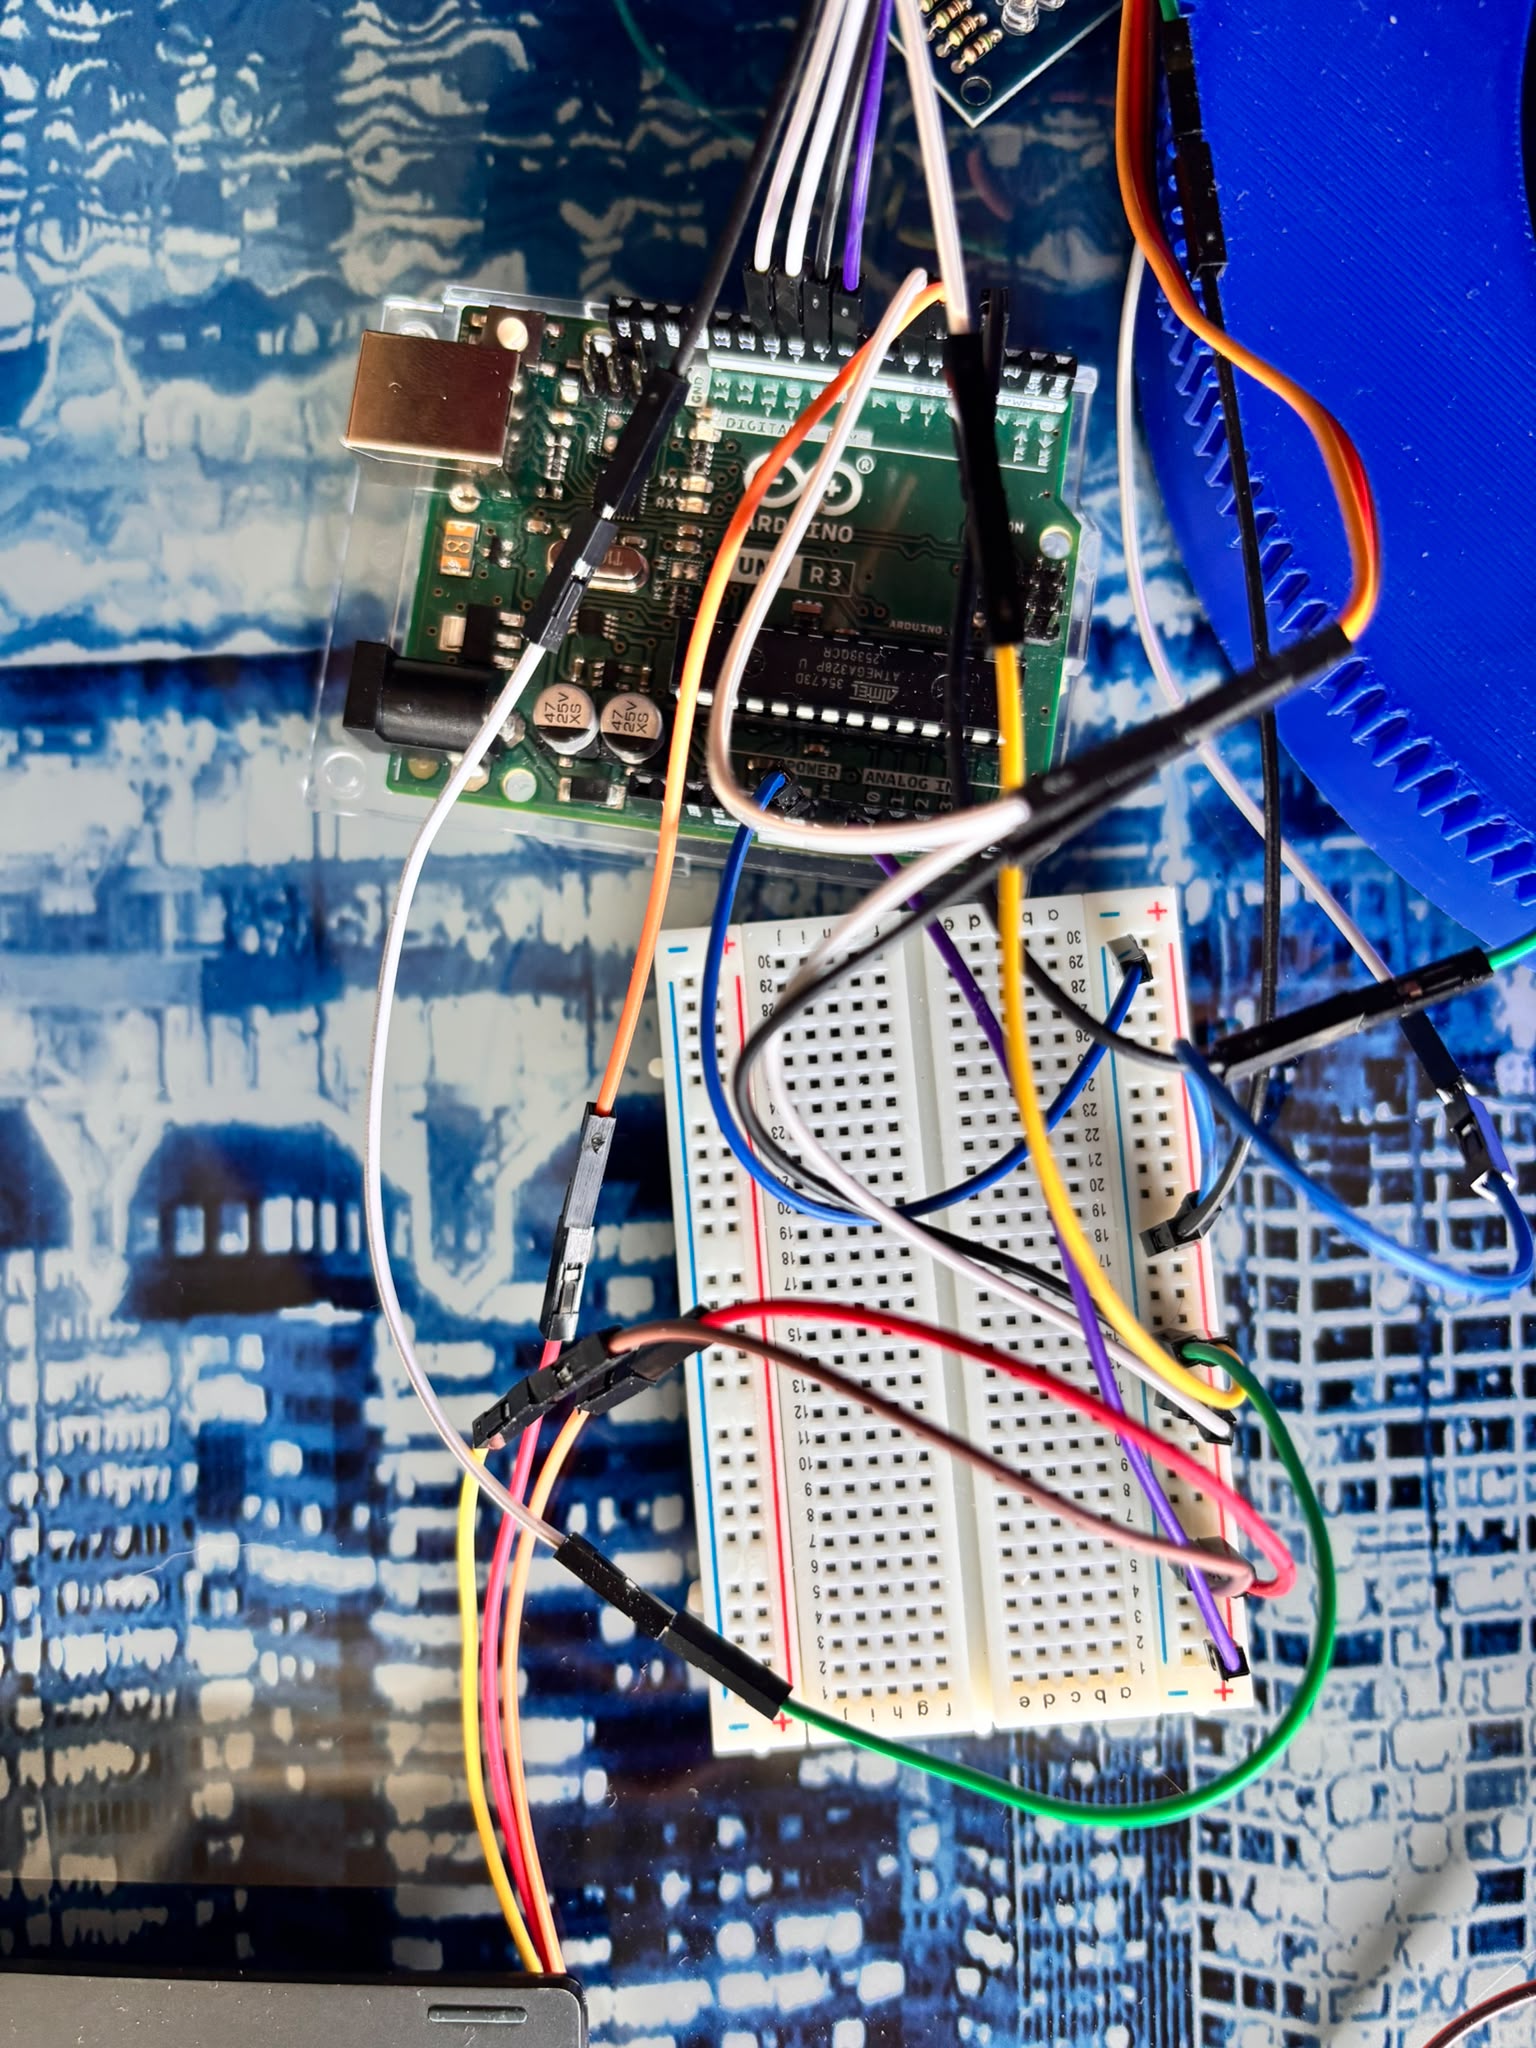
The Jukebox is a fully self-built robotic system that automates the act of playing a vinyl record. A robotic arm — driven by four motors and controlled by an Arduino Uno — descends to grip a record from a vertical holder, lifts it, rotates, and deposits it onto a turntable inherited from my grandparents.

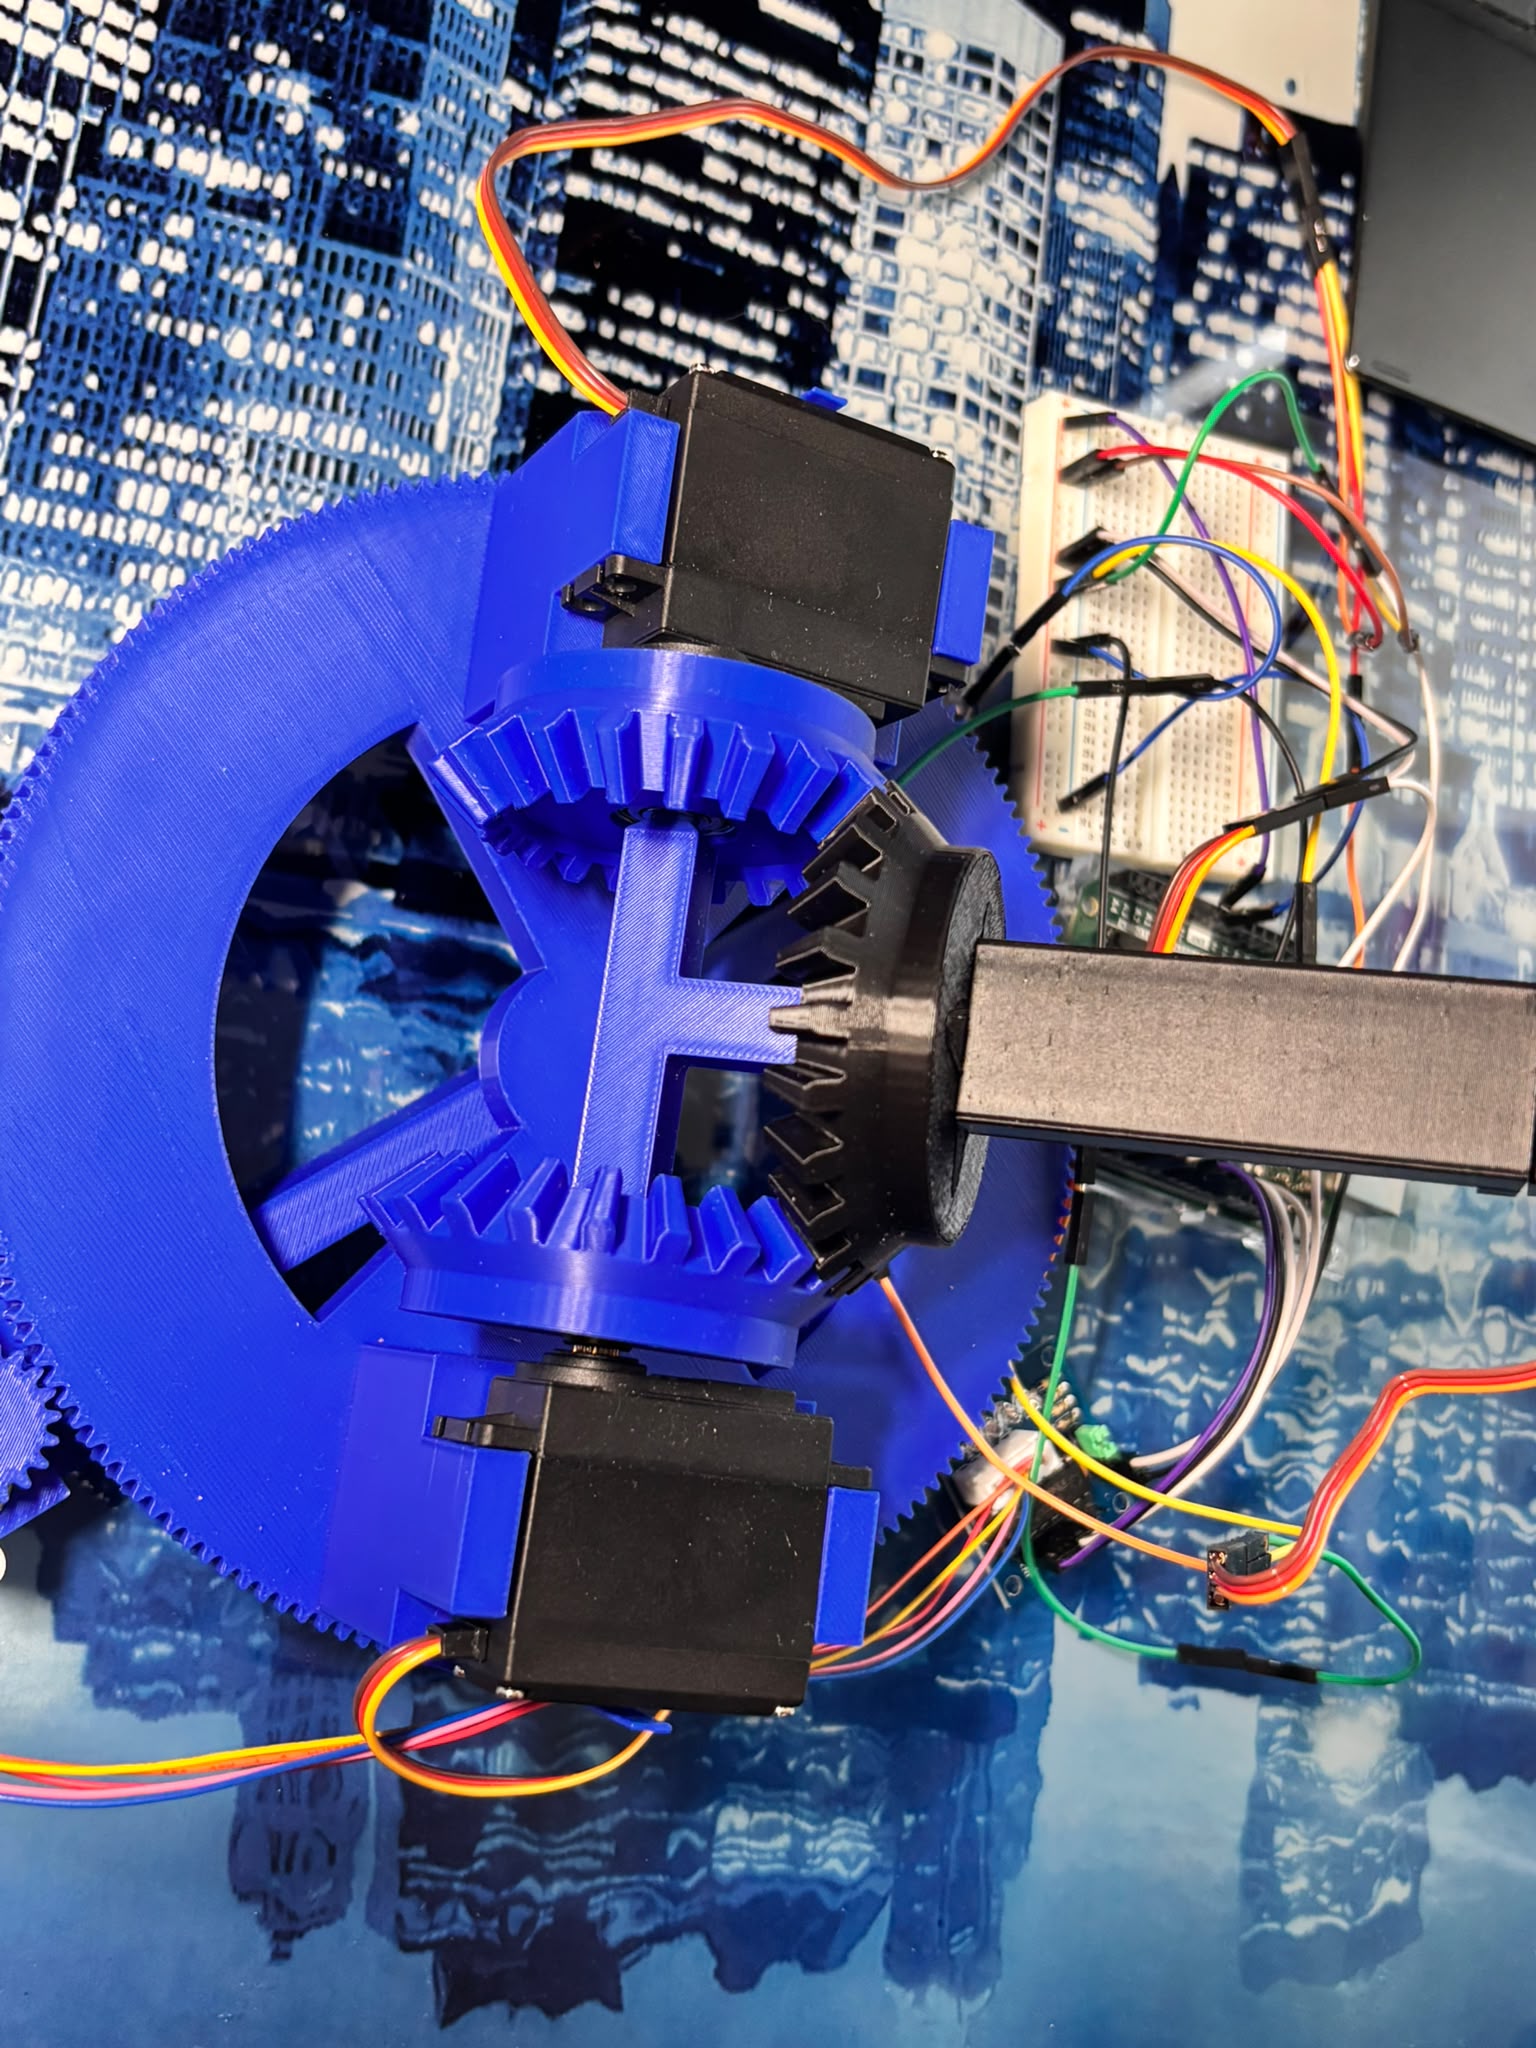
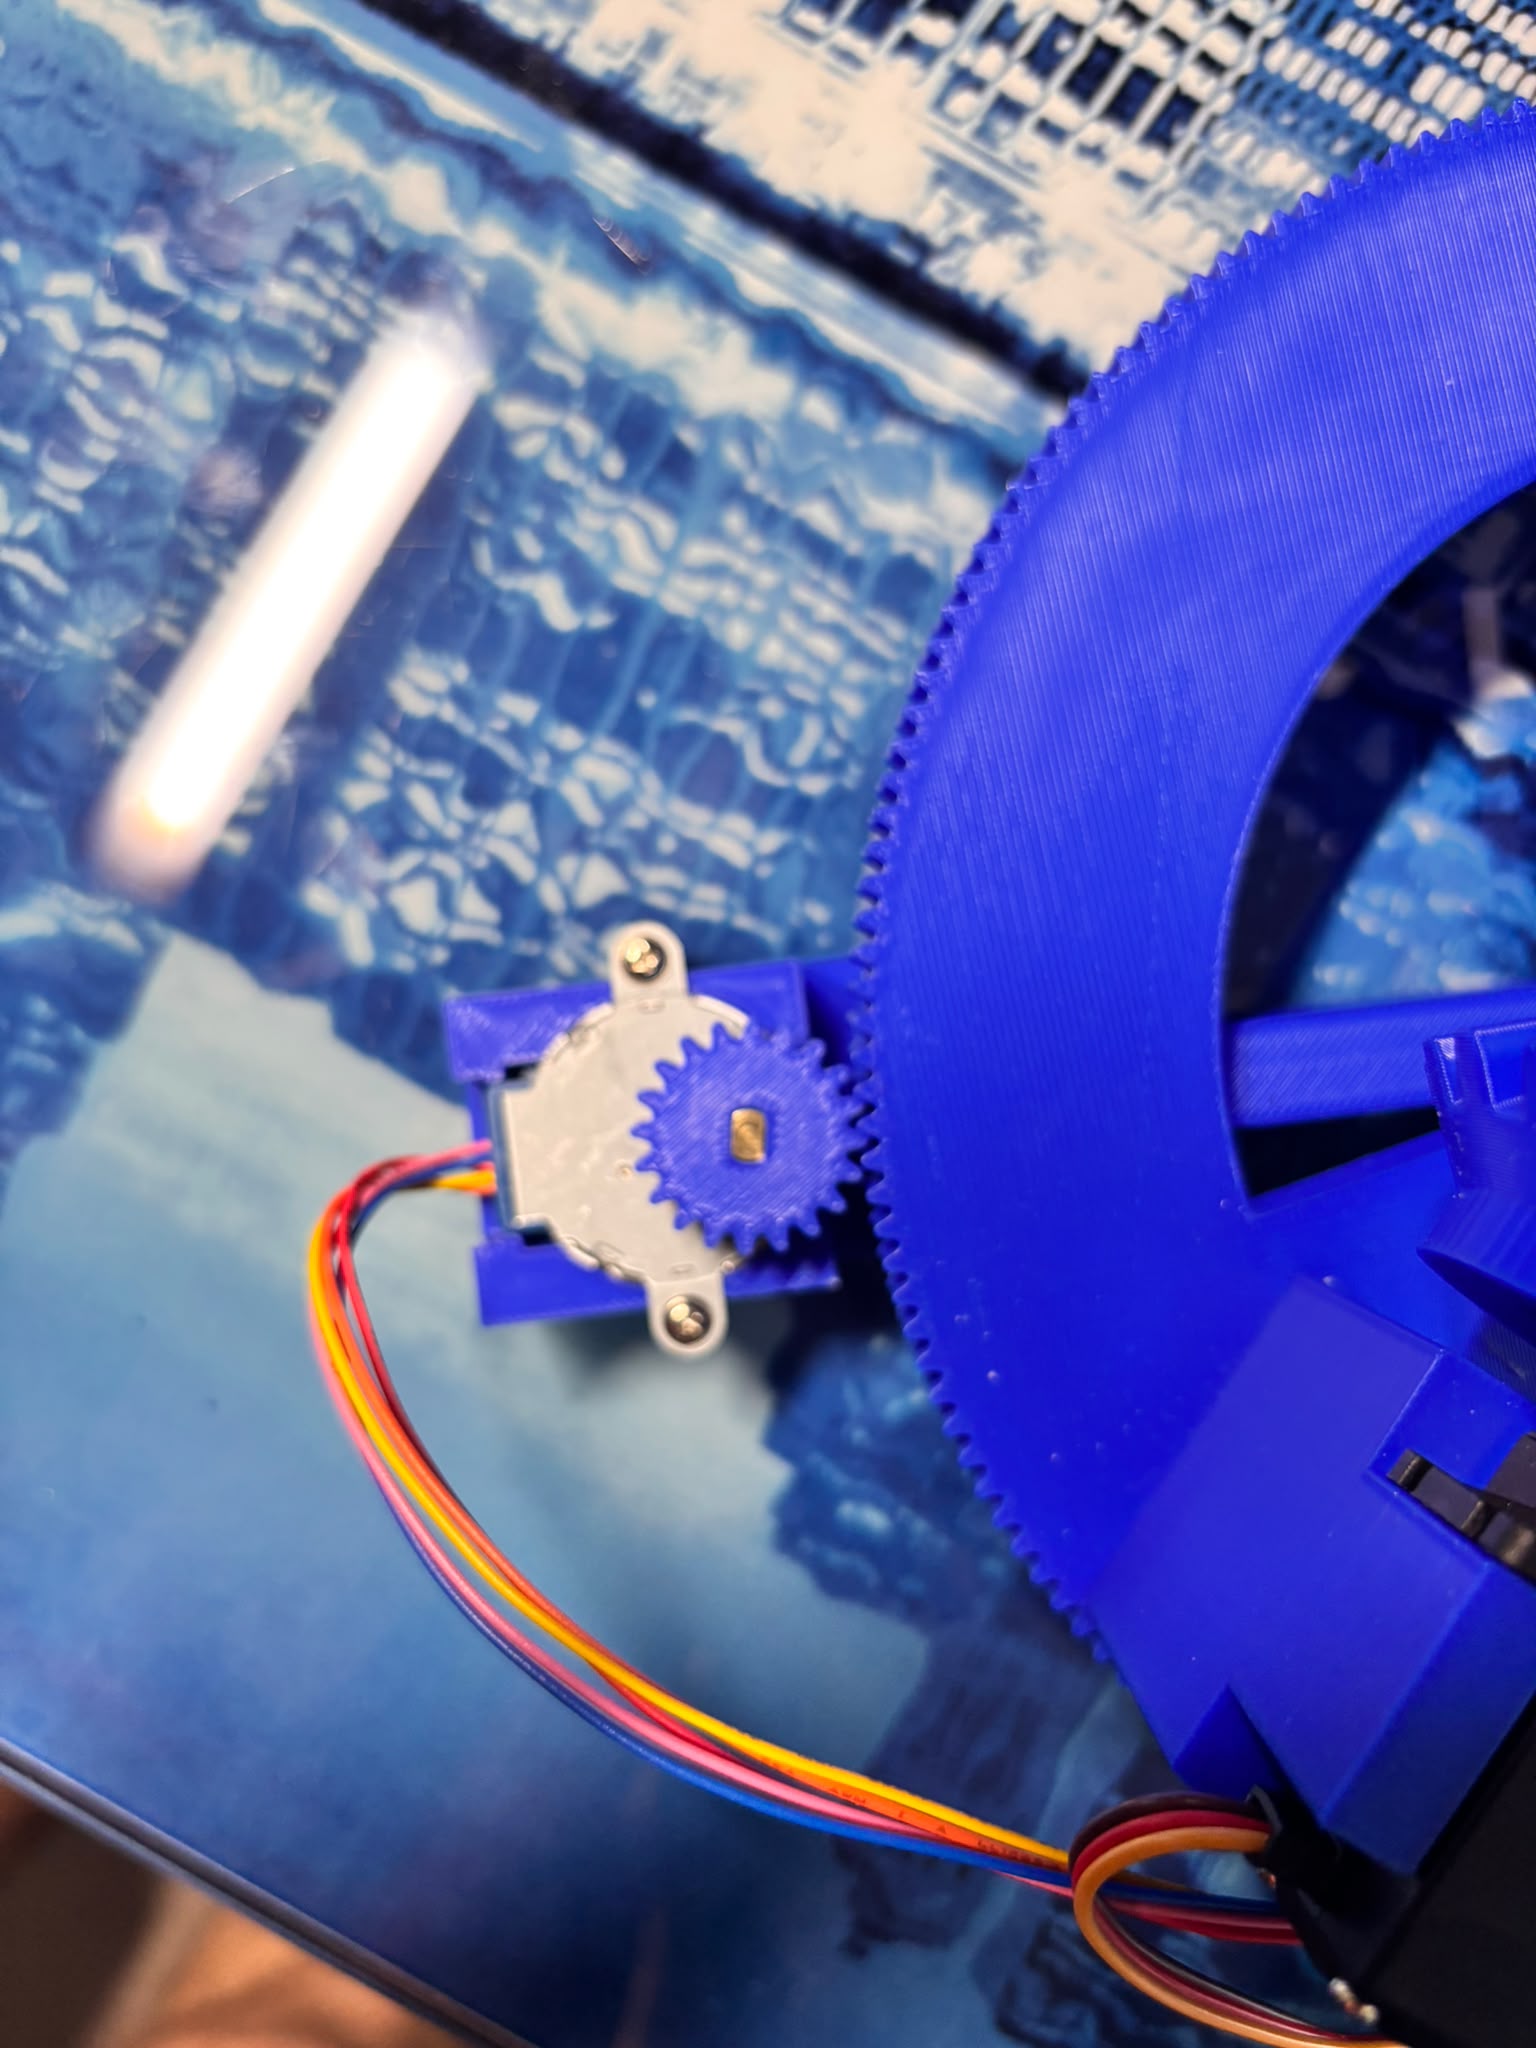
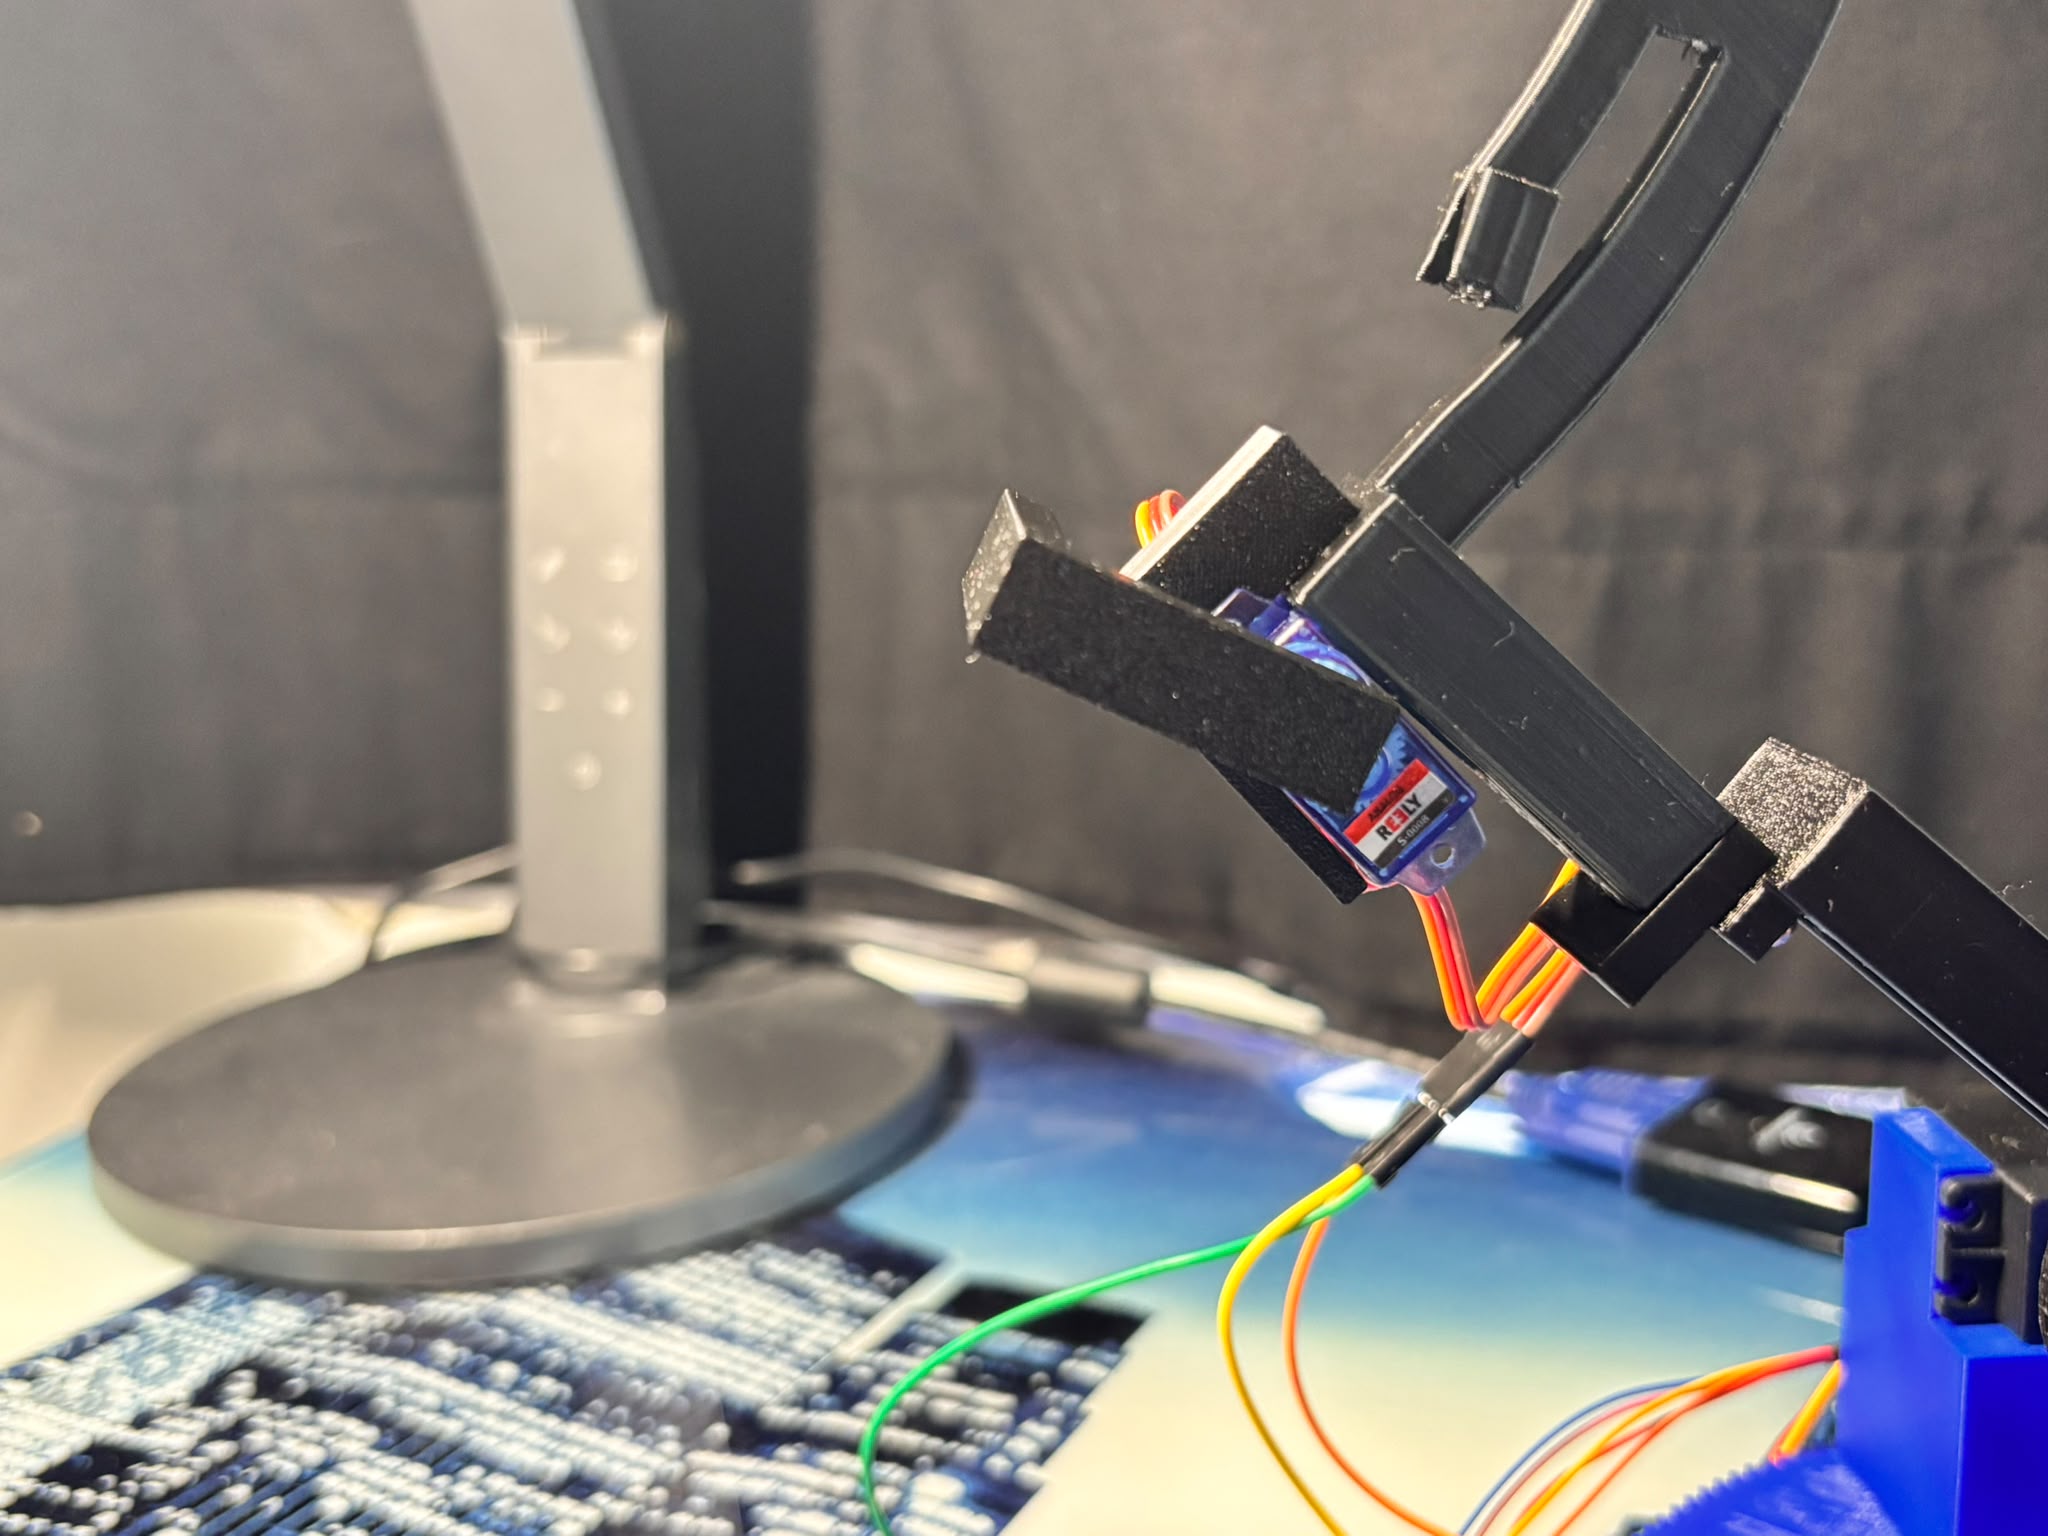
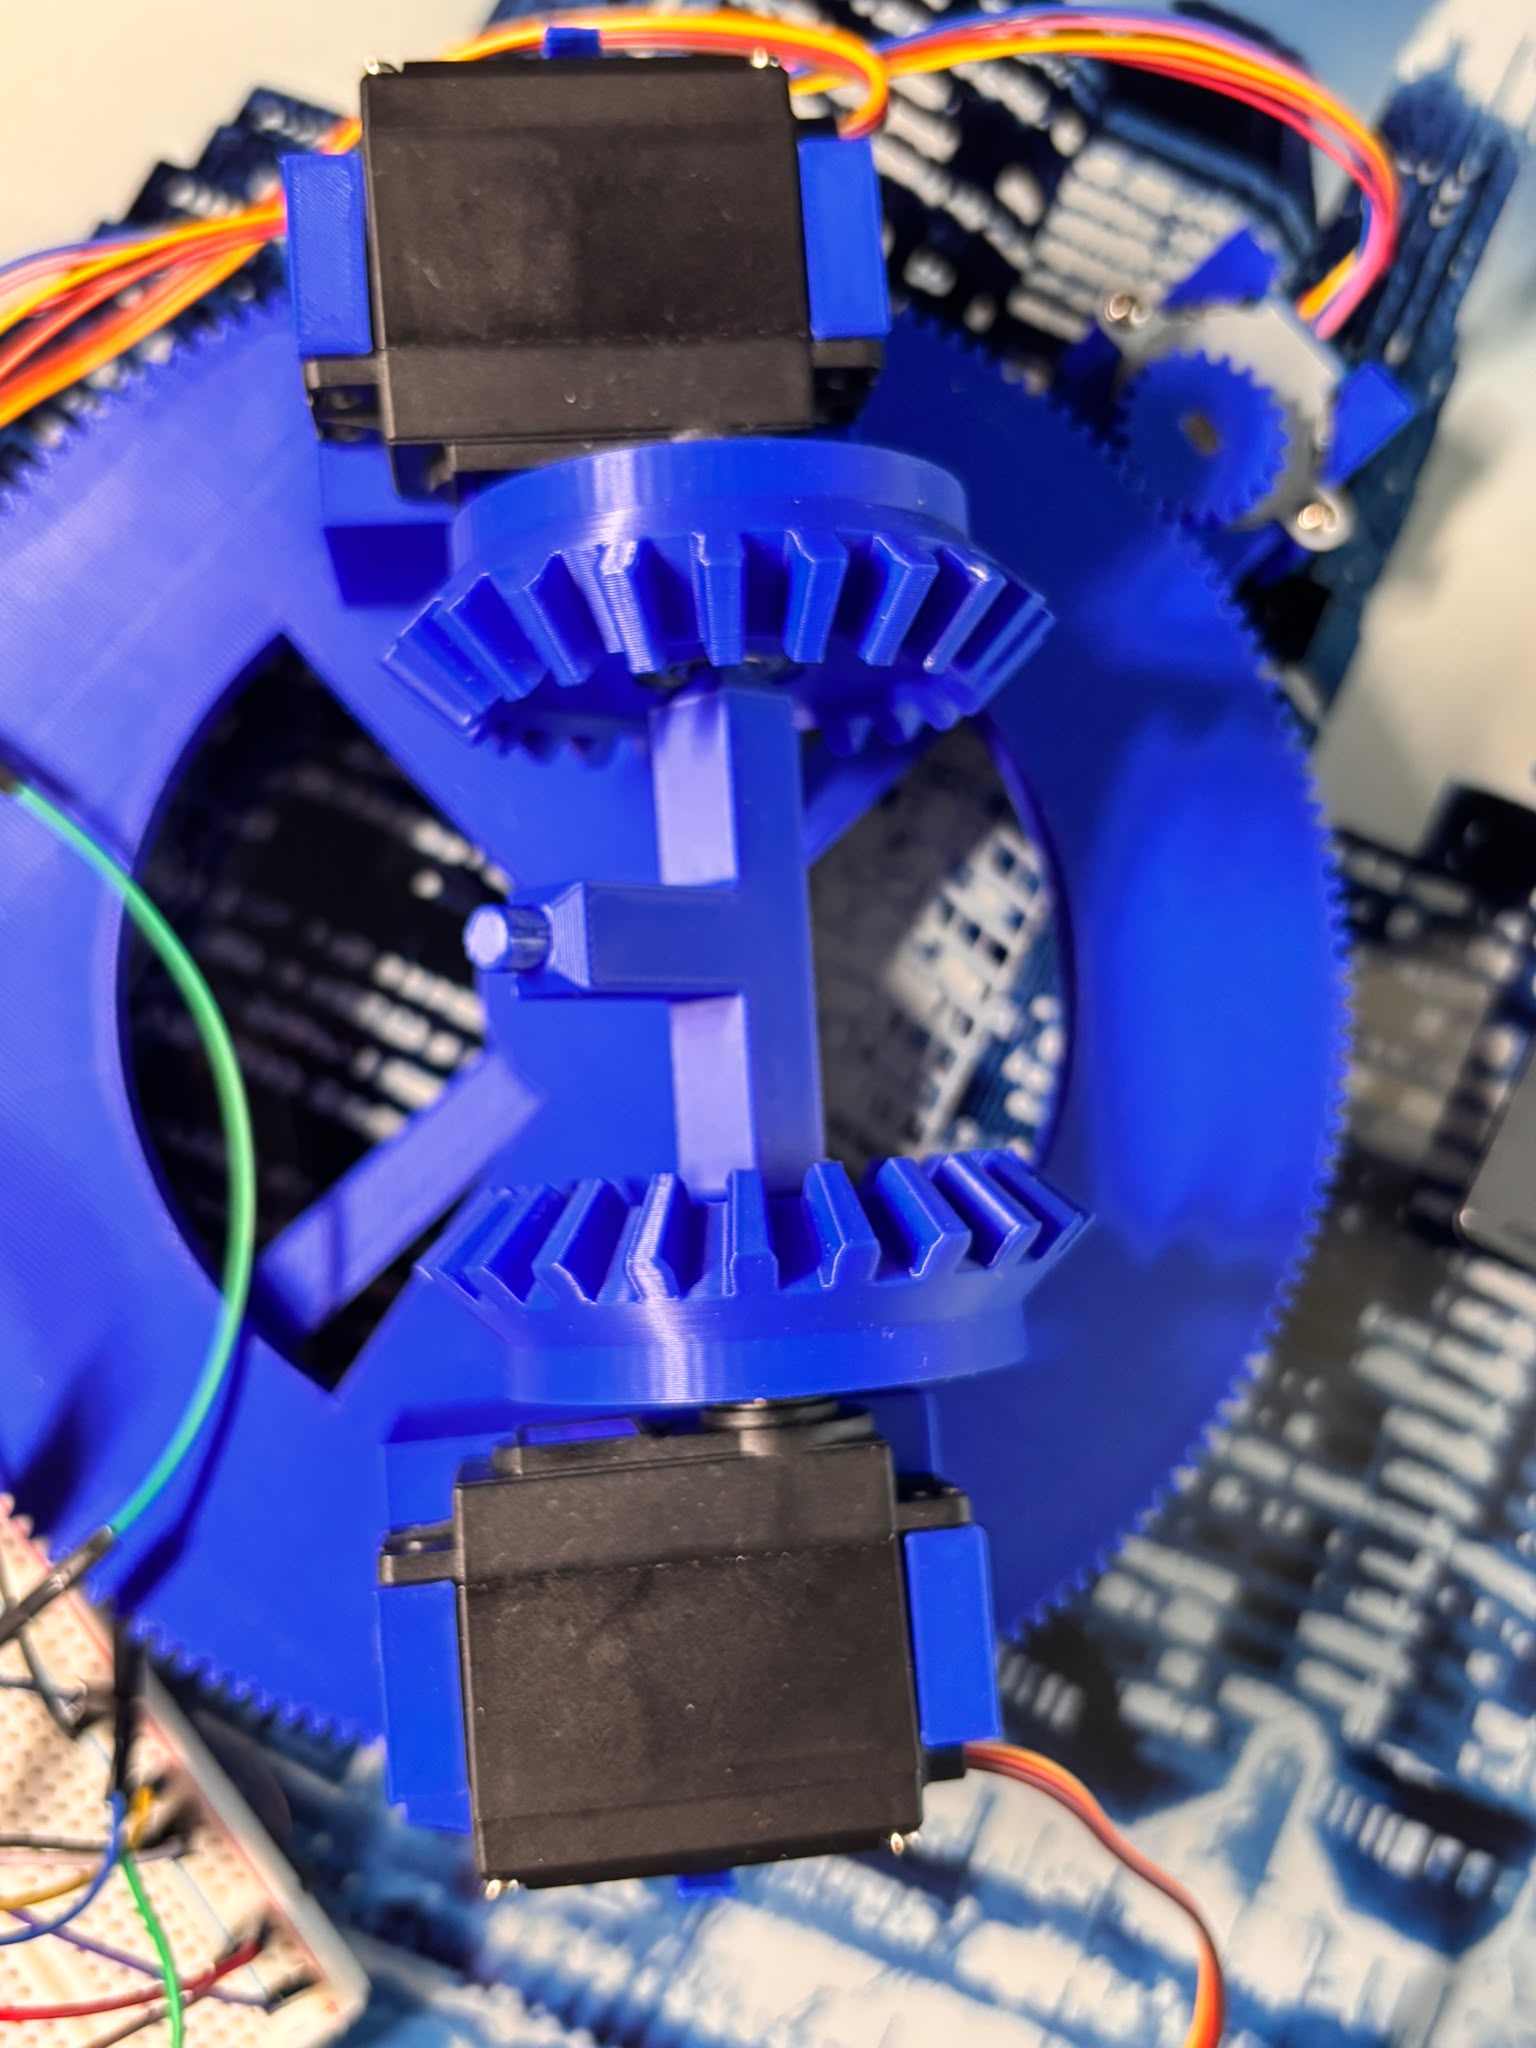
The arm moves along three axes: it extends vertically via a miter gear system driven by two 10Nm servos, rotates around its own axis using the same two servos in opposite directions, and sweeps horizontally via a stepper motor driving a large printed ring gear. A fourth mini servo on the arm clamps the record with a small horizontal bar that slots into the record's notches.

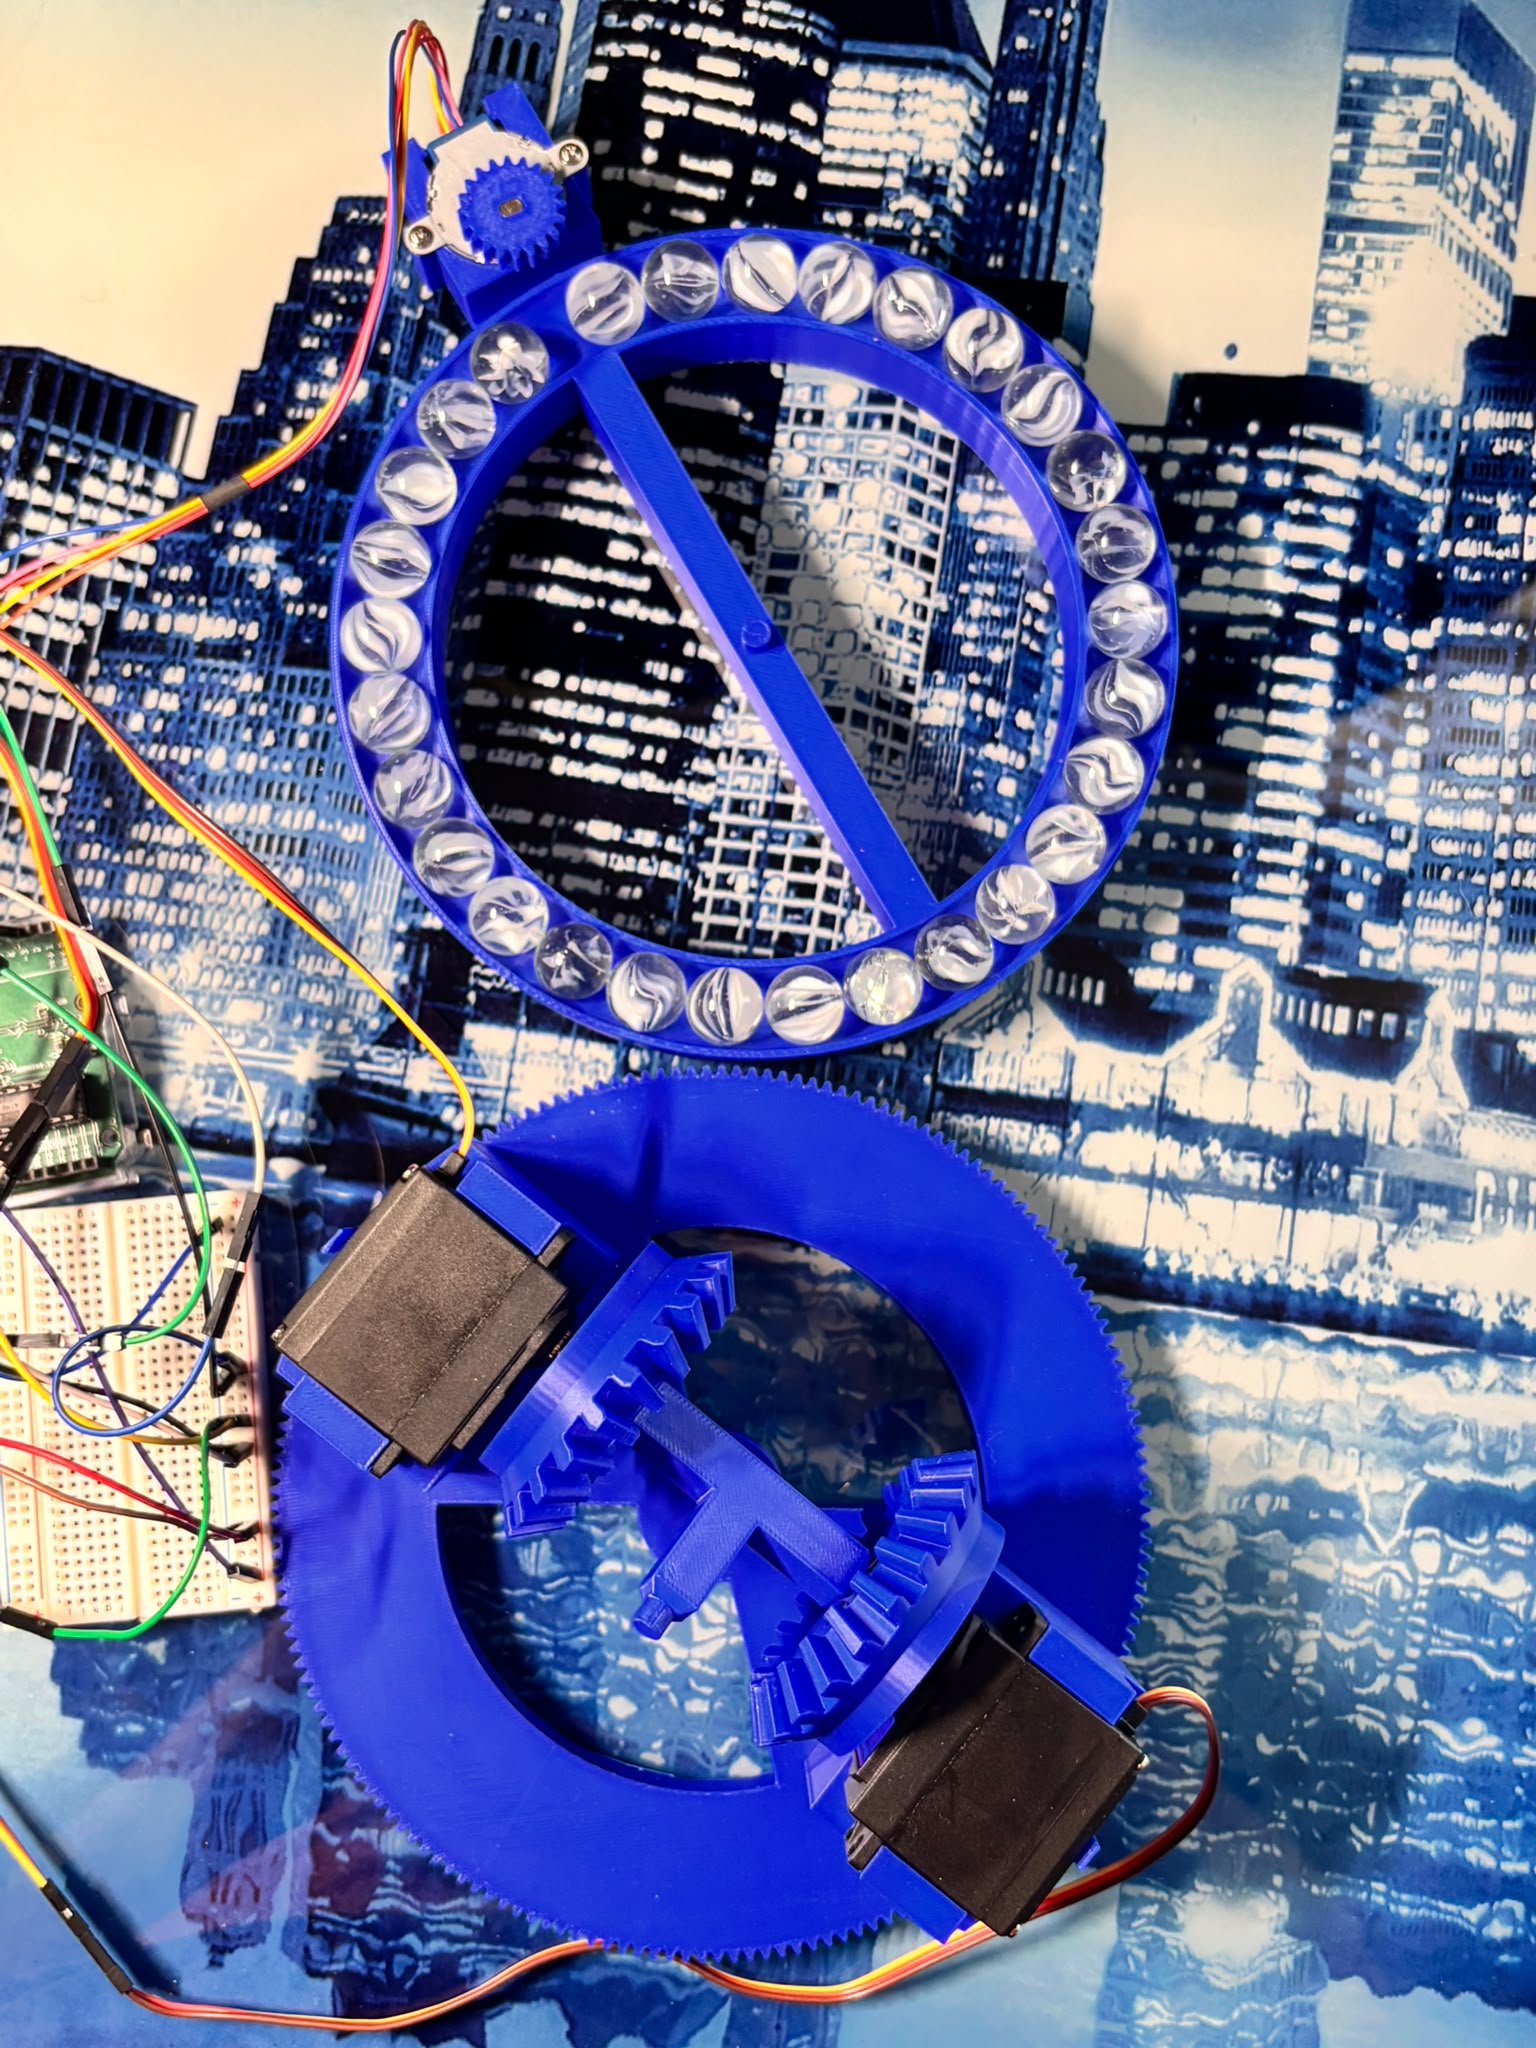
The core challenge was the kinematic design. After considering rails, rotating carousels, and horizontal storage, I discovered the vintage jukebox mechanism in the reference video below — and adapted it: instead of rotating a carousel to present the record to a fixed arm, I designed the arm to rotate and reach stored records directly. This gave far more flexibility.

Watch the vintage jukebox mechanism that inspired this build
Status
Functional prototype. Picks one hardcoded vinyl position and deposits on turntable. Awaiting full automation.
Storage
Currently 4 records on a single vertical holder. Target: ¾ circle arc with multi-level stacking for 33⅓ rpm records.
Power
6V mains adapter → Arduino Uno R3. Servos wired in parallel to Vin.
CAD
All 15 parts modelled in Fusion 360. Miter gears adapted from a GrabCAD base design. Everything else original.
Custom bearing
The large z-axis rotation ring uses handmade glass-ball bearings — glass marbles held in a printed race — instead of a purchased ball bearing (CHF 30+), chosen for availability and cost.
02 — In action

The arm at work

Jukebox arm — pick & place sequence · Arduino Uno R3 · 6V
03 — Mechanics & Electronics

How the arm moves

The core insight of this build is the miter gear differential. Two 10Nm servo motors are mounted face-to-face, both driving the same pair of conical gears. When they rotate in the same direction, their torques add and the arm rotates around its own longitudinal axis. When they rotate in opposite directions, the torques cancel on the rotation axis and the net effect is a vertical lift or descent. This gives two independent degrees of freedom from two motors — elegant and compact.

The third degree of freedom — horizontal sweep — is provided by a large ring gear printed in PLA, driven by a small stepper motor gear. The ring sits on the custom glass-ball bearing race. The stepper's 28BYJ-48 steps 2048 micro-steps per revolution, giving fine angular resolution sufficient to locate each record position.

The gripping mechanism is a mini servo mounted on the arm itself. The arm descends around the record (notches on the arm's inner profile align with the record edge), then the mini servo rotates a small horizontal bar to lock the record in place. The arm lifts, the whole assembly rotates 90° around its own axis, sweeps horizontally toward the turntable, and releases.

Miter gears
Miter gear differential — 2× 10Nm servos
Miter gears system
Large ring gear + stepper motor
Ball bearing
Handmade glass-marble bearing ring
Stepper
Stepper motor driving ring gear
Vinyl holder arm
Arm with mini servo clamp
Cone arm
Cone guide for easier record capture
Circuit
Arduino Uno R3 — servos in parallel to Vin — 6V adapter
Turntable
Vintage turntable — recovered from grandparents
Power supply
6V mains adapter. Servos wired in parallel to Arduino Vin — shared GND with logic.
Actuators
2× 10Nm servo (miter differential), 1× 28BYJ-48 stepper (ring rotation), 1× mini servo (gripper).
Control
Arduino Uno R3. Adafruit MotorShield library for stepper, standard Servo.h for servos.
04 — CAD Models

3D Parts — interactive

Drag to rotate · Scroll to zoom · All parts printed in PLA. Miter gears adapted from GrabCAD, everything else original.

↻ Drag to orbit · scroll to zoom
05 — Embedded Code

Arduino C++ — pick & place

The control logic uses two helper functions, same() and opp(), to drive the two miter servo motors either in the same direction (arm rotates on its axis) or in opposite directions (arm rises/descends). The stepper handles horizontal sweep.

jukebox.ino — Arduino C++
#include <Wire.h>
#include <Adafruit_MotorShield.h>
#include <Servo.h>
#include <Stepper.h>

Servo servo1, servo2, servo3;
int pos1, pos2, pos3;
const int STEPS_PER_REV1 = 2048;
Stepper myStepper(STEPS_PER_REV1, 8, 10, 9, 11);

// same(): both servos move in same direction → arm rotates on its own axis
void same(int begin1, int begin2, int change, int speed) {
  int pos = 0;
  if (change < 0) {
    for (pos; pos > change; pos -= 1) {
      servo1.write(begin1 + pos);
      servo2.write(begin2 - pos);
      delay(speed);
    }
  } else {
    for (pos; pos < change; pos += 1) {
      servo1.write(begin1 + pos);
      servo2.write(begin2 - pos);
      delay(speed);
    }
  }
  pos1 += change; pos2 -= change;
}

// opp(): servos in opposite directions → arm rises or descends
void opp(int begin1, int begin2, int change, int speed) {
  int pos = 0;
  if (change < 0) {
    for (pos; pos > change; pos -= 1) {
      servo1.write(begin1 + pos);
      servo2.write(begin2 + pos);
      delay(speed);
    }
  } else {
    for (pos; pos < change; pos += 1) {
      servo1.write(begin1 + pos);
      servo2.write(begin2 + pos);
      delay(speed);
    }
  }
  pos1 += change; pos2 += change;
}

void loop() {
  // 1. Descend onto record
  same(pos1, pos2, -50, 30);
  delay(3000);
  // 2. Mini servo locks record
  for (int i = 100; i > 28; i -= 1) { servo3.write(i); delay(30); }
  same(pos1, pos2, 50, 30);
  // 3. Stepper sweeps arm to turntable position
  myStepper.step(-5000);
  delay(3000);
  // 4. Arm rotates 90° on its axis, descends, releases
  opp(pos1, pos2, 90, 30);
  same(pos1, pos2, -55, 30);
  servo3.write(100);
  myStepper.step(500);
  same(pos1, pos2, 55, 30);
  myStepper.step(-500);
  opp(pos1, pos2, -90, 30);
  // 5. Return to home
  myStepper.step(5000);
  delay(1000);
}
06 — Timeline

From idea to working prototype

Dec 2025

The idea

Decided I wanted to automate my vinyl collection. Spent weeks thinking through kinematic approaches — rails, rotating carousels, horizontal storage — without a satisfying answer.

Dec 2025 — Apr 2026

Equipment & inspiration

Acquired 3D printer, motors, Arduino, breadboard, and cables over four months. Discovered the vintage jukebox mechanism in a YouTube restoration video — immediately recognised it as the right architecture.

Apr–May 2026

Design iterations

Initial design had the arm fixed — records would come to it. Pivoted to a rotating arm. Hit a hard constraint: 180° servo range was insufficient for the pick-and-place motion. Added the self-rotation axis via the miter gear differential, solving it elegantly.

May 2026

Build week

One intensive week: all 15 parts modelled in Fusion 360, printed in PLA, assembled, wired, and coded. The custom glass-ball bearing replaced a CHF 30 purchased bearing — marbles from a jar worked perfectly.

Jun 2026

Functional prototype

First successful pick & place. One hardcoded vinyl position, manual turntable. Jukebox principle proven — improvement roadmap defined.

07 — Next steps

What comes next

The prototype proves the concept. These are the improvements needed to reach a fully autonomous, user-ready jukebox.

01
Multi-record storage

Replace the 4-slot linear holder with a ¾-circle arc rack around the arm. Upgrade stepper to 360° continuous servo for full rotation. Implement position lookup so any record can be selected by index.

02
Vertical stacking

Add multi-level record storage — the arm's vertical axis already supports it mechanically. Stack holders on a linear rail so the arm can address different heights and multiply storage capacity.

03
Automated turntable

Acquire a turntable with an automatic tonearm. Disassemble and hack its electronic circuit to expose start/stop signals to the Arduino. Fully close the loop: no human intervention from selection to playback.

04
33⅓ rpm support

Current build is sized for 45 rpm singles (7"). Redesign arm geometry and holder dimensions for 33⅓ rpm LPs (12"), which make up the bulk of my vinyl collection.

05
Selection interface

A physical panel with labelled push buttons — one per record — in a vintage style. No screen, no app: just buttons with handwritten labels next to each slot, true to the jukebox aesthetic.

06
Integrated chassis

Consolidate arm base, record holders, and turntable into one rigid printed or machined chassis. Eliminate the current sprawl of separate components and give the build a proper enclosure worthy of the name "jukebox".

Fusion 360 PLA / FDM Arduino Uno R3 C++ Embedded Servo Control Stepper Motor Miter Gears Custom Ball Bearing Mechatronics Vinyl · 45rpm